Just about all of the associations we work with have an annual conference. While we have a thorough conference management system available, we still get interesting custom requests. Most recently we were asked to create one of those hover and click maps, like what you see when you are choosing your seats on an airline.
Wouldn’t it be nice, if vendors wanting to exhibit at your conference could see the floor space, see what is available — and then book it?
We just completed this for the National Tank Truck Carrier’s Association and realized why not share a few tips. Even if you are not currently working with us, you can pass this guide along to your web development team to simulate many of the things we’ve done here.
Pre-reqs:
1. You will need a copy of the floor plan space.
2. You will need some javascript knowledge
3. Ideally you are using a content management system that will allow you to create custom data so that it is easy to add/move/remove vendors as they sign up
Nice to haves: a way of booking unoccupied space, this could be a simple form to email, or a more robust system like ConferenceCMS.
Alright let’s get started!
Step 1
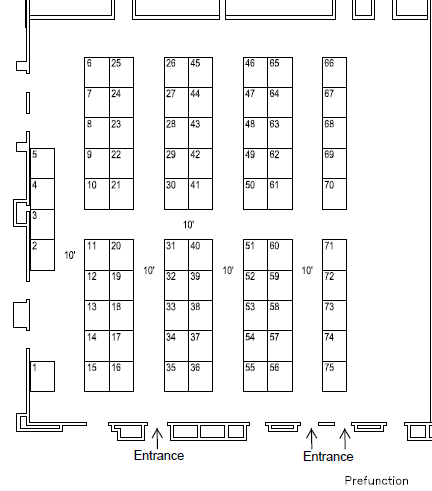
Take the PDF of your floor plan and convert it to an image. We cheat a little and just take a screenshot of the PDF. Then crop out everything but the room we need.
We get something like this:
Step 2
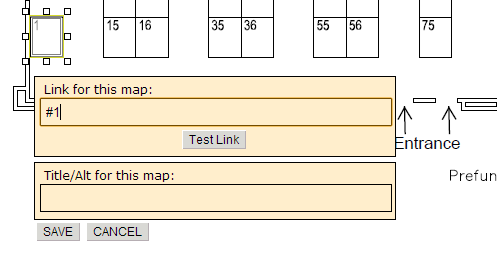
We found a great tool to quickly create Image Maps. Using this tool we can draw regions (usually just rectangles) that we want to overlay as hoverable / clickable regions.
The trick here is to chronologically link each item. For example we will set the links here as anchors #1, #2, #3 and so on. This will help us out later on when we need to show occupied / unoccupied spaces.
The Image Map tool exports some HTML we can use, and we can paste that right into our page.
Step 3
Build some way of storing occupancy in the database. We just use a simple json array:
{"Id":1,"Title":"","Content":"","Url":""},{"Id":2,"Title":"","Content":"","Url":""},
{"Id":3,"Title":"","Content":"","Url":""}
Here we want to track the ID (to correspond to the anchors in step 2), perhaps a title of who is occupying, maybe a link for more information.
We are using the Sitefinity content management system and built a custom module to let NTTC make updates without needing to contact us each time a vendor signs up.
Step 4
Now we create a front end widget that does all of the rendering.
First we add a CSS rule:
occupied { background: gray!important; opacity:0.4;filter:alpha(opacity=40); }
Then we have some simple jQuery which runs on load. What this says is, if we have an occupied square, mark it as occupied and show some more information about the vendor; otherwise have that square redirect to our booking page.
<script type="text/javascript">
    $(document).ready(function () {
     $.getJSON("/WidgetFiles/ImageMaps/<%= MapFileName %>", function (data) {
            $.each(data.VendorItems, function (item, value) {
                if (value.Title != "") {
                    $('a[href=#' + value.Id + ']').addClass("occupied");
                    $('a[href=#' + value.Id + ']').attr("title", 'Section ' + value.Id + ' occupied by ' + value.Title);
                    $('#vendorArea').append('<p><a name="' + value.Id + '" href="' + value.Url +
                     '">' + value.Id + " " + value.Title + '</a><br/>' + value.Content + '<hr/></p>');
                }
                else {
                    if ("<%= BookRoomUrl %>" != "") {
                        $('a[href=#' + value.Id + ']').attr("href", "<%= BookRoomUrl %>");
                    }
                }

            });
        });
    });
</script>
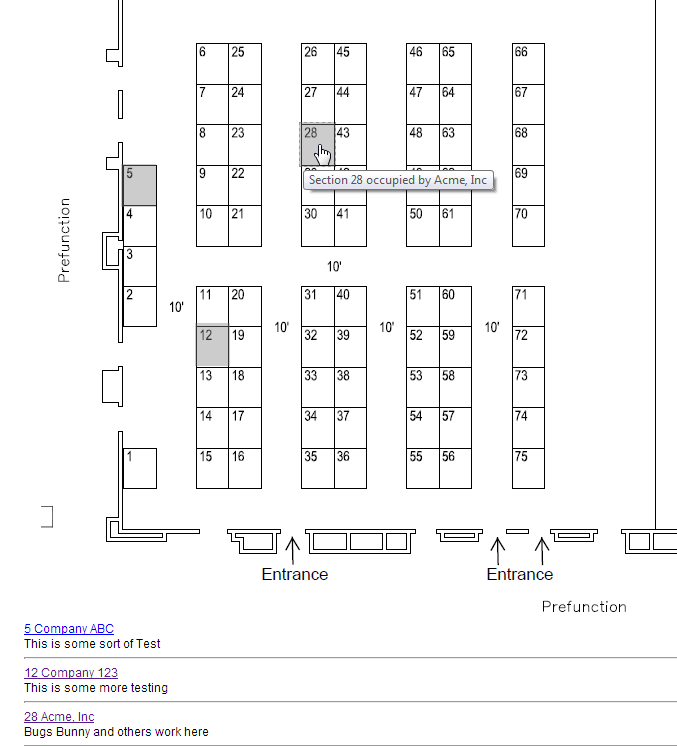
The results
Putting this all together we have something we have our hover and click to view a vendor — or click an empty square to begin the booking process.


